Proper belaying technique is one of the most important safety measures in rock climbing. By following proper standards, you’ll be able to take appropriate action in the case of an emergency so that both you and your climbing partner are protected.
If you’re unsure how to belay safely, always seek the help of a certified instructor before wagering somebodies life.
Our guide below will provide you with a comprehensive overview of the Pull, Brake, Under, Slide (PBUS) method of belaying. This proven-effective technique is regarded as the safest way to belay and can help save your partner’s life if implemented correctly.
What is Belaying?
Belaying is the process by which you use a rope and device system to ensure a climber’s safety. Belayers make sure that climbers have enough rope and slack, as well as assist them with their descent.
Proper belaying requires the use of techniques that allow the belayer to respond in the case of an emergency.
It’s the responsibility of the belayer, for instance, to stop the rope in case of a fall. Belayers must remain attentive and ready to respond at all times, or else they risk putting their partner’s life in danger.
We’re going to go over the most commonly-used belaying technique in detail so that you can have a better understanding of how to protect your partner during the climb.
What is PBUS?
If you’ve ever attended rock climbing school, or if you’ve been in the field for any length of time, you’re bound to have heard of PBUS.
This powerful belaying method is routinely taught in climbing schools, as it’s the most-effective way to protect you and your partner in case of an emergency.
By following PBUS, you’ll be ready to respond to emergency situations in a manner that will minimize the damage to all involved.
Proper PBUS implementation can literally be a difference between life and death, so make sure that you’re following the procedure correctly. There are no shortcuts to using this method, so don’t gloss over any of the important steps.
Before you ever start your climb, you and your partner should both have a thorough understanding of the PBUS method. If you don’t, review and practice in a safe location until you can climb and belay safely.
Getting Set Up
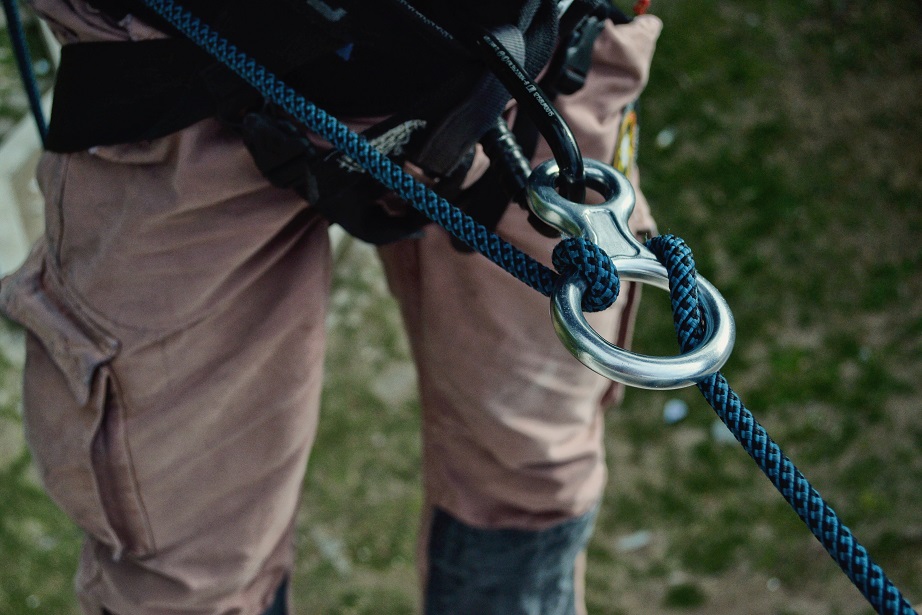
Before we go into the particulars of the PBUS method, it’s important that you make sure that you have set up your harness and belaying device correctly.
Without the proper set up, you and your partner could be at risk, even if you follow the PBUS method.
Consider the following tips when setting up your belaying device:
- Use a Figure 8 Knot—When tying into the harness, make sure that the climber is using a Figure 8 Knot. This method adds extra protection and keeps the climber connected to the belayer.
- Use a Stopper Knot—On the belayer’s end, you’re going to want to tie a stopper knot to keep the rope from being able to pass through the belaying device. Without this knot, if your partner falls, there will be no way to stop them.
- Don’t Intertwine—Make sure that your ropes are tied in the correct positions so that they won’t overlap and cause your climber to get crossed in mid-air. This can make falls more dangerous, as the climber will not simply dangle—they’ll be tossed around.
- Lock the Belay Carabiner—Before you start, make sure that the belay carabiner is locked.
With these tips in mind, let’s take a closer look at the PBUS method and how you can implement it for safer rock climbing.
How Do You Use PBUS?
To get started using PBUS, remember what it stands for: Pull, Break, Under, Slide.
Let’s look at each of these in turn:
- Pull—The first part of the PBUS method, “pull” refers to the belayer’s responsibility of pulling in slack during the climb. This is done to keep the rope tight by pulling in extra rope. In the PBUS method, belayers should pull down with their guide hands while pulling out with their brake hands. In effect, this passes the rope through the belaying device. Note: this is the only portion of the PBUS method in which you won’t have both hands under the belaying device. This is done so that the rope can move through the device as you pull down on the climber’s side of the rope with your guide hand and out with your brake hand.
- Brake—In this step, you’ll return you brake hand to its position under the belaying device. Keep in mind that as long as your brake hand and the rope are under the belaying device, you’ll be ready to catch your partner in the event of a fall. Unique to the PBUS method, remaining in a brake position when not pulling is the best way to ensure your partner’s safety during the climb.
- Under—For added safety, you’ll want to put your guide hand below your brake hand on the rope below the belaying device. In doing so, you add an extra layer of protection, as you’ll be able to respond quickly and decisively if the climber starts to fall. In this way, you’ll be better prepared to provide a strong grip on the rope if need be. This is especially important if you have a climber who is overweight, as you’ll need to be able to get as powerful a grip as you can to help stop them in case of an emergency.
- Slide—Now that you have both your guide and your brake hands under the belaying device, slide your brake hand up near the ATC. Be sure not to get too close, as this puts your hand at risk of being pinched by the ATC. You’ll stay in this position until it’s necessary to once again pull and reduce the slack on the rope. Make sure that you don’t break from this stance until then so that you can better protect the climber.
As you can see, PBUS is a simple method—but don’t underestimate its effectiveness.
Proper implementation of this belaying technique can help save the climber’s life and better position you in case of an emergency.
Remember: as a belayer, you have the incredible responsibility of protecting your partner and of making sure that their climb is completed without a hitch.
That’s why it’s so important that you follow the PBUS method exactly. You may find that others prefer to modify the method, but it’s better to stick with the technique as described.
Following the above blueprint can help ensure that you’re implementing the PBUS method correctly. If you’re still unsure of how to use this method while belaying, consider seeking professional instruction before starting your climb. Because PBUS is the most widely-accepted belaying technique, it won’t be hard to find an instructor or another climber who can help show you the ropes.
Tips to become better at belaying
With the above information in mind, consider the following tips so that you can enjoy a better belaying experience.
- Practice—Before you go out for your first climb, practice with an instructor or an experienced partner to make sure that you’re using the PBUS method correctly. Be open to criticism, as you want to ensure that you’re not making any mistakes.
- Be Attentive—A fall can happen at any time, and they’re usually pretty rapid. Make sure that you’re being attentive while using proper PBUS technique so that you can respond immediately when something happens. If you’re not utilizing proper technique—you don’t have your hand in the “brake” position, for example—you could lose precious seconds of reaction time and put your partner at risk.
- Braking—There are a few situations in which the climber might want to take a break—in which case, you’ll need a “brake” of your own. Any time the climber is hanging—whether from a fall or from a need to rest—you need to make sure that you’re in a strong braking position with your guide hand held below your brake hand on the rope. The rope should be held under the belaying device to prevent it from being able to be passed through. This is absolutely imperative, as misplacing the rope can cause dangerous or even fatal flaws.
- Lowering—Proper PBUS technique is also essential when lowering a climber. Because falls are likely—and because the descent can rapidly accelerate—it’s important that you’re in a position that you can stop and catch the climber if need be. In order to do this, you’ll first want to pull slack through the device before entering the brake position. Once everyone is set, you’ll use your guide hand to pass the rope through the belaying device to help bring the climber down. Your brake hand will control the speed and should be prepared to enter the brake position in the case of an emergency
- Repeat Often—You’re going to have to repeat the PBUS method several times during the climb. Don’t get locked into one position. Any time that you need to adjust the slack of the rope, be sure to implement the PBUS method over again from the beginning.
- Belay with a Partner—If you’re looking to train your belaying skills, consider getting an experienced belayer to accompany you and show you some pointers. This can provide extra safety for the climber, as well as help you improve your own PBUS technique.
Why PBUS Is Better Than Other Techniques
It may surprise you to learn that in the history of rock climbing, PBUS is still a relatively-new technique.
In fact, it wasn’t introduced until the 21st-century, but it’s quickly become a favorite of instructors everywhere.
Why?
Because it offers superior protection over former belaying methods that kept both hands and the rope above the belaying device. PBUS is unique in that it utilizes a below-the-belayer approach that helps protect the climber in the event of an emergency.
Former belaying techniques don’t provide the same level of protection. Instead of the belayer being prepared and in brake position already, with other techniques, the belayer will have to switch to a braking stance as soon as something happens.
Because falls can be rather quick, former approaches to belaying made them all the more dangerous, as the climber’s life depended on the belayer’s reaction speed. If they were too slow or distracted, there was no natural safeguard that could stop the climber in the case of a fall. Now, however, the belayer will automatically be in the brake position (unless they are pulling the rope, at which time it would be easy to adjust to the brake stance) so the climber doesn’t have to worry about free falling. With the brake stance already being utilized, the climber will automatically be stopped if they fall. For this reason, the PBUS method has caught on among rock climbers and instructors everywhere as the preferred belaying technique.
Using this technique properly during your own climbs will provide a safer overall experience.
The Bottom Line
For those looking to get into rock climbing, learning the PBUS technique is a must. This proven-effective technique is the best way to ensure the safety of the climber as they ascend and descend a rock wall or mountainside.
By memorizing the proper Pull, Brake, Under, Slide technique, belayers can be trained to handle an emergency situation.
Be sure to practice the PBUS method with a certified instructor or qualified individual before going out on your own climb. Mastery of this method is essential to having a safe climb, as it can save the climber’s life. When used correctly, it can also protect the belayer from unnecessary injury.
By following the information and the tips as outlined above, you can get started with safer rock climbing sooner than you ever thought possible. Just remember: don’t skip out on following proper PBUS technique. While rock climbing is fun, it’s not a game, so don’t treat it like one. You won’t get a second chance if there’s a mistake, so get it done right the first time by using the proper PBUS belaying method.
Read our article on the Most Common Belaying Mistakes to protect yourself from belaying pitfalls.